Classic Red Velvet Cake Recipe | Moist & Flavorful
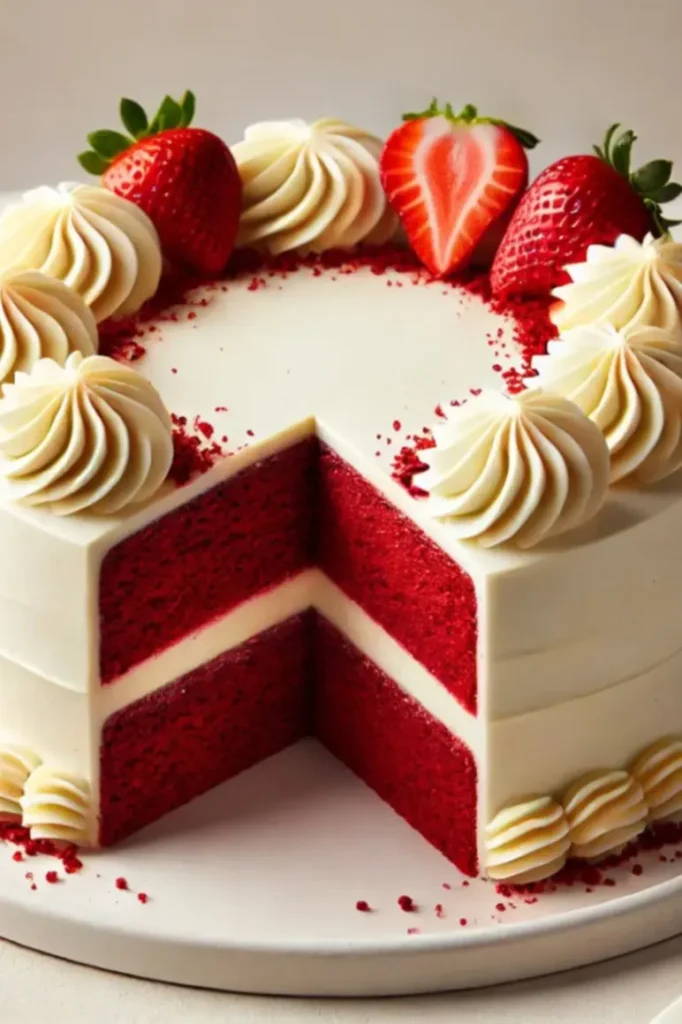
Classic Southern red velvet cake with buttermilk, cocoa & cream cheese frosting. Easy step-by-step recipe for moist, velvety layers—perfect for any occasion!
The Story and Secrets Behind Red Velvet Cake
A Southern United States Classic with a Great Depression Twist
Red Velvet Cake isn’t just a dessert—it’s a slice of history. This crowd-pleaser originated during the 1930s when resourceful home bakers in the Southern United States turned simple ingredients like buttermilk and vinegar into something magical. The cake’s brownish-red color came from a natural chemical reaction between non-dutched cocoa powder (acidic) and buttermilk. Today, many recipes use food coloring to boost their iconic red hue, but the distinct taste remains rooted in tradition.
Why This Recipe Will Shock Red Velvet Fans (In the Best Way)
Tired of dry, bland, or sickeningly sweet desserts that tease you with a hint of cocoa but taste like sugar bombs? This fabulous recipe fixes everything. Unlike popular store-bought red velvet cakes, it’s moist for days, with enough chocolate flavor to satisfy without overpowering. Whip it up super easy for birthdays, Valentine’s Day, 4th of July, or Christmas—anytime a craving strikes. Even skeptics become fans after one bite. No more anger over crumby textures or fake flavors. Just perfect, velvety layers you will enjoy eating… and soon call your go-to.
1/2 cup (8 Tbsp; 113g) unsalted butter, softened to room temperature
2 cups (400g) granulated sugar
1 cup (240ml) canola or vegetable oil
4 large eggs, room temperature and separated
1 Tablespoon pure vanilla extract
1 teaspoon distilled white vinegar
liquid or gel red food coloring
1 cup (240ml) buttermilk at room temperature
Cream Cheese Frosting:
16 ounces (452g) full-fat brick cream cheese, softened to room temperature
3/4 cup (12 Tbsp; 170g) unsalted butter, softened to room temperature
5 cups (600g) confectioners’ sugar
1 and 1/2 teaspoons pure vanilla extract
pinch of salt to taste
Directions to Make Red Velvet Cake
Preparing the Ingredients and Pan
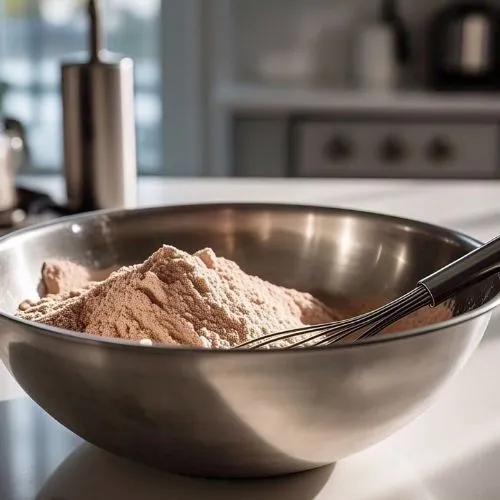
Begin by preheating your oven to 350°F (177°C). Grease two 9-inch cake pans thoroughly, then line the bottoms with parchment paper to ensure easy release. In a medium bowl, whisk together 3 cups (360g) of cake flour (spooned and leveled for accuracy), 1 teaspoon baking soda, 2 tablespoons (10g) of unsweetened natural cocoa powder, and ½ teaspoon salt. Setting this dry mixture aside.
Ensure all wet ingredients—4 large eggs, 1 cup (240ml) buttermilk, ½ cup (113g) unsalted butter, and cream cheese for the frosting—are at room temperature. This step is crucial for a smooth, lump-free batter and frosting.
Mixing the Wet and Dry Ingredients
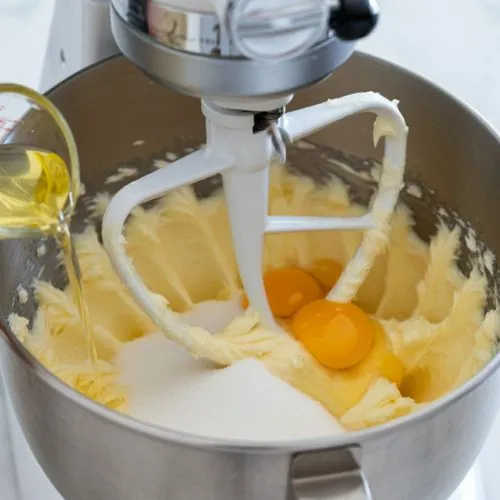
In a large mixing bowl, beat ½ cup (113g) softened unsalted butter and 2 cups (400g) granulated sugar until light and fluffy, about 3 minutes. Gradually pour in 1 cup (240ml) of canola or vegetable oil while mixing, keeping the cake moist. Add 4 large egg yolks (reserve the whites for later), 1 tablespoon pure vanilla extract, 1 teaspoon distilled white vinegar, and your preferred liquid or gel red food coloring (use gel for a vibrant hue without thinning the batter). Once combined, alternate adding the dry ingredients and 1 cup (240ml) buttermilk to the butter mixture, starting and ending with the dry mix. Stir until just incorporated; overmixing leads to a dense cake.
Whipping the Egg Whites for Lift
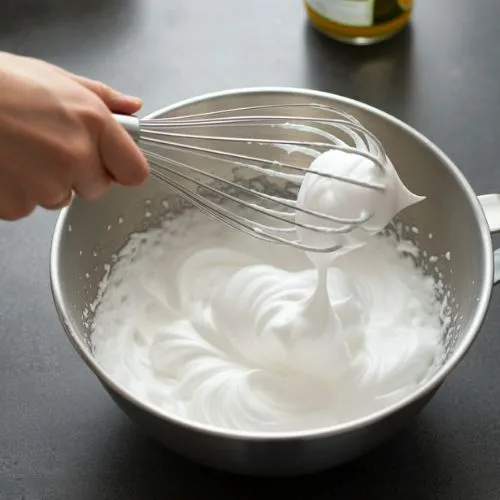
In a clean, grease-free bowl, beat the 4 large egg whites until stiff peaks form. This step, often overlooked, adds airiness to the batter. Gently fold the whipped whites into the batter using a spatula. The result? A velvety texture that’s light yet rich.
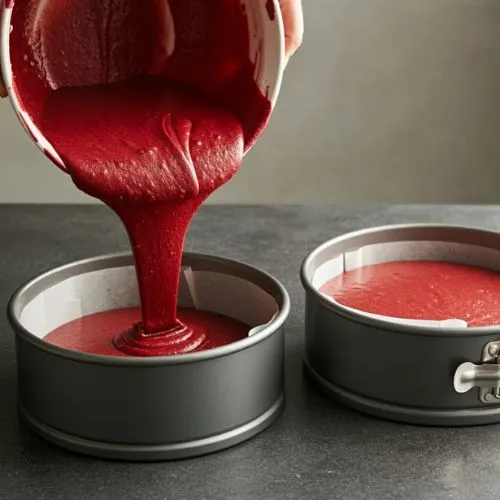
Baking the Cake Layers
Divide the batter evenly between the prepared pans. Bake for 25–30 minutes or until a toothpick inserted into the center comes clean. Let the layers cool in the pans for 10 minutes, then transfer them to a wire rack to cool completely. If the cake's dome is slight, use a serrated knife to trim the tops for flat, even layers.
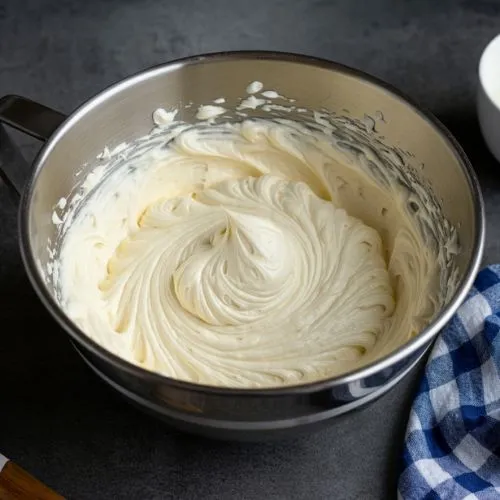
Making the Cream Cheese Frosting
While the cakes cool, prepare the cream cheese frosting. Beat 16 ounces (452g) softened full-fat cream cheese and ¾ cup (170g) softened unsalted butter until smooth. Gradually add 5 cups (600g) of confectioners’ sugar, 1½ teaspoons pure vanilla extract, and a pinch of salt. Whip on high speed for 2 minutes until fluffy. Taste and adjust salt if needed—this balances the sweetness.
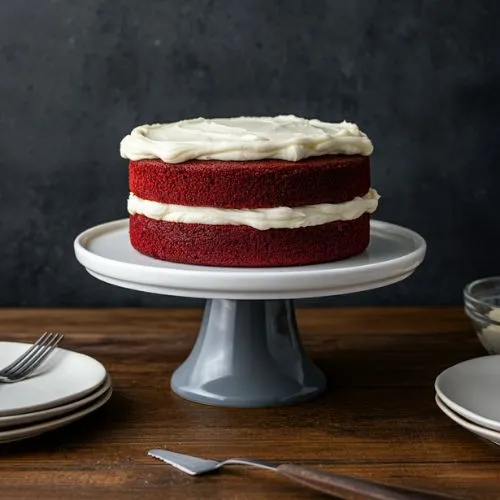
Assembling and Decorating the Cake
Place the first cake layer on a serving plate. Spread a generous amount of frosting evenly over the top using an offset spatula. Repeat with the remaining layers. Apply a thin crumb coat to the cake to seal in crumbs, then chill for 20 minutes. For a polished finish, add a final thick layer of frosting.
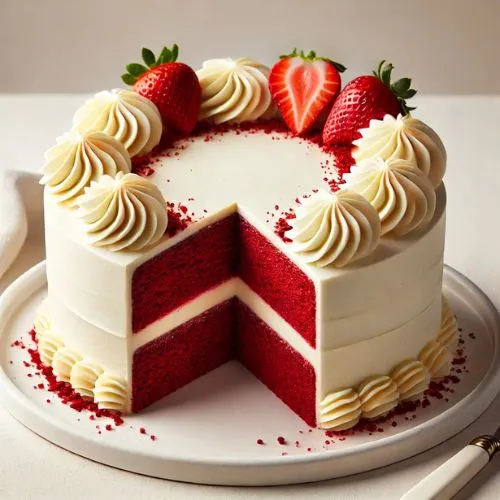
If decorating, use a 1M piping tip to create rosettes or swirls. Refrigerate the cake for at least 1 hour before slicing, ensuring clean cuts.
Expert Tips for Baking Success Explained
1️⃣. Room-Temperature Ingredients Are Non-Negotiable
Cold ingredients (like eggs, butter, or buttermilk) don’t blend smoothly, leading to a lumpy batter or frosting. The butter must be soft (not melted!) to trap air when creamed with sugar, which gives the cake lift. Eggs mix better into the batter when cold, creating a silky texture. If you forget to take them out early, place eggs in warm water for 5–10 minutes.
2️⃣. Hot Liquid “Blooms” Cocoa Powder
Adding hot coffee or water to cocoa powder isn't just for show. The heat helps "bloom" the cocoa, releasing its rich flavor. Think of it like steeping tea—without this step, your cake might taste flat. Don't worry: the coffee flavor bakes out, leaving behind a chocolatey depth. No coffee? Use hot water or even hot milk.
3️⃣. Gel Food Coloring = Bold Red, No Watery Batter
Liquid food coloring adds moisture, throwing off the batter’s balance and diluting flavor. Gel coloring (like Ann Clark or Wilton) is concentrated, so a little goes a long way. For a natural twist, try beet powder—it adds an earthy-red hue (but won't be as vibrant). Mix the gel with the cocoa powder first to avoid streaks.
4️⃣. Trim Domed Layers for Pro-Level Stacking
Oven heat causes cake layers to rise faster at the edges, creating a dome. Use a serrated knife to slice off the dome (save the scraps for cake pops!). Flat layers stack neatly and won't tilt when frosted. Prevent doming: Wrap damp cake strips around the pans to insulate them—this slows edge baking so the center rises evenly.
Bonus Tip:
If the frosting feels too soft, chill it for 15 minutes before piping. If your cake feels dry, brush cooled layers with simple syrup (equal parts sugar + water) before frosting. It adds moisture without sweetness overload!
The Flavor Illusion: Why Everyone Guesses Wrong
Is it chocolate? Vanilla? Nope—Red Velvet Cake plays a delicious trick. It teases with a hint of cocoa, then hits you with a tangy kick from buttermilk and vinegar, all wrapped in sweet vanilla warmth. This isn't just cake—a flavor riddle that keeps taste buds guessing. Skeptics side-eye it until the first bite, then suddenly get it. Homemade versions crank up the magic: acidic ingredients react instantly, creating a velvety texture that box mixes can't fake. It's the dessert equivalent of a plot twist.
Texture Sorcery: Where Moist Meets Melt-in-Your-Mouth
Forget dry, crumbly cakes. A proper Red Velvet Cake feels like a cheat code: dense enough to slice cleanly yet so soft and moist it dissolves on your tongue. The secret? Buttermilk tenderizes the crumb, while vinegar balances sweetness and lifts the texture. Compare it to brownies (too fudgy) or cookies (too crisp), and you'll see why this cake stands alone. After years of baking, I've learned to skip the buttermilk, and you lose the velvet. It's science—and sorcery.
Buttermilk 101: The Science Behind the Tender Crumb
Buttermilk isn't just for tang. Its acidity tenderizes the crumb and reacts with baking soda for lift. Want to substitute it? Whole milk mixed with lemon juice works, but as my article on Buttermilk 101 notes, the final taste and texture will be different. I learned this the hard way in my early days—my cake was denser, missing that velvety lightness.
Modern Recipes vs. Traditional Ones: What’s Changed?
Modern versions often ramp up the cocoa powder and lean on food coloring for that iconic red hue. But here's the thing: the name isn't just about color. It references the velvety crumb from the science of buttermilk and acid (like vinegar) breaking down gluten. I've tested traditional and modern batters side by side, and the older methods—using just a hint of cocoa—create a more delicate crumb.
Food Coloring: More Than Just a Liquid or Gel
Red food coloring is iconic, but not all options are equal. Liquid coloring can water down the batter, while gel or 'natural' concentrated types (like beet powder) pack a punch. After testing colors for years, I've concluded that Ann Clark's natural gel is the winner. It's extremely pigmented, offers a huge pay-off, and doesn't fade over time. Pro tip: Mix it with cocoa powder for a lovely shade without artificial vibrancy.
Why Room Temperature Ingredients Matter (Mostly)
One rule I swear by? Room temperature ingredients—eggs, dairy, even butter—ensure a uniform, cohesive batter. The exception? Hot coffee or water enhances the cocoa's 'bloom,' unlocking a full, rich flavor. Skip this, and your cake loses depth.
Not Just Cake: Cupcakes, Brownies, and More!
The unique taste works beyond classic layers. Try Red Velvet Cupcakes with a delicately piped frosting swirl or brownies blended with velvet batter. It's a perfect way to please lovers of chocolate and vanilla—without picking sides.
Cream Cheese Frosting: Why It's Perfect for Red Velvet Cake
Cream cheese frosting is the best match for red velvet cake. Its tangy taste balances the cake's sweetness and pairs perfectly with its buttermilk flavor. Some bakers use ermine frosting (a less sweet, old-fashioned frosting made with cooked flour) to let the cake's flavor stand out. Others use buttercream for fancy decorations because it holds its shape better. But in my experience, cream cheese frosting is the winner—it's creamy, rich, and adds the perfect finish. Don't hold back—spread it thick for the best results!
How to Decorate Your Red Velvet Cake Like a Pro
1️⃣. Trim (or torte) the tops of your cake layers with a serrated knife to create flat surfaces. If your red velvet layers didn't bake perfectly flat, don't panic—trimming fixes everything.
2️⃣. Slather a generous amount of frosting on the first cake layer, then use an offset spatula to smooth it. Repeat with the next cake layer on top.
3️⃣. Spread excess frosting on the sides to cover the entire cake with a thin layer (this is your crumb coat). Chill for 20 minutes—this step is non-negotiable if you hate crumbs in your final layer!
4️⃣. mix 1.5x the cream cheese frosting recipe for piping to ensure you have enough. Use a 1M piping tip to create rosettes on the cake. New to piping? Check a beginner's piping tutorial—the 1M tip is forgiving and creates instant elegance.
5️⃣. Once decorated, pop the cake in the fridge to firm up. Cold cake is easier to cut, but let it sit at room temperature before eating—trust me, it's worth the wait.
Tips for Variations, Substitutions & Modifications
Gluten-Free: Swap cake flour for a 1:1 gluten-free blend (add ½ tsp xanthan gum if not included).
Dairy-Free: Use plant-based butter, vegan cream cheese, coconut milk + 1 Tbsp lemon juice (for buttermilk).
Egg-Free: Replace eggs with ½ cup unsweetened applesauce or 4 flax eggs (4 Tbsp ground flaxseed + 10 Tbsp water).
Sugar-Free: Substitute granulated sugar with erythritol and confectioners’ sugar with powdered monk fruit.
Lower Fat: Replace oil with unsweetened applesauce (texture will be denser).
Flavor Twists: Add orange zest to the batter or swap cream cheese frosting for mascarpone whipped cream.
What to Serve With Red Velvet Cake
Classic Pairings: Vanilla bean ice cream, fresh berries (strawberries/raspberries), or a drizzle of salted caramel.
Beverages: Hot coffee, cold milk, or a sweet dessert wine like Moscato.
Texture Contrast: Toasted pecans, chocolate shavings, or a crunchy cookie crumble on the side crumble on the side.
Storage Instructions
Room Temperature: Store unfrosted cake layers (wrapped tightly) for 1–2 days.
Refrigerator: Frosted cake is kept for 5 days in an airtight container. Bring to room temperature before serving.
Freezer: Wrap individual slices in plastic + foil; freeze for up to 3 months. Thaw overnight in the fridge.
Best Season:
Suitable throughout the year, Holidays
Description
Classic Southern red velvet cake with buttermilk, cocoa & cream cheese frosting. Easy step-by-step recipe for moist, velvety layers—perfect for any occasion!
Ingredients
For The cake:
3cups cake flour (spooned & leveled)
1tsp baking soda
2tbsp unsweetened cocoa powder
1/2tsp salt
1/2cup unsalted butter, softened
2cups granulated sugar
1cup canola/vegetable oil
4large eggs, room temperature (yolks & whites separated)
1tbsp pure vanilla extract
1tsp white vinegar
1tbsp gel red food coloring
1cup buttermilk, room temperature
Cream Cheese Frosting:
16Oz cream cheese, softened
3/4cup unsalted butter, softened
5cups confectioners’ sugar
1 1/2tsp pure vanilla extract
Pinch of salt
Directions
1
Preheat the oven to 350°F (177°C). Grease two 9-inch cake pans and line with parchment.
Whisk dry ingredients: In a bowl, combine flour, baking soda, cocoa powder, and salt.
Cream butter & sugar: Beat butter and sugar until fluffy. Mix in oil, egg yolks, vanilla, vinegar, and food coloring.
Alternate mixtures: Add dry ingredients and buttermilk to the butter mixture in 3 parts, starting and ending with dry.
Fold egg whites: Whip egg whites to stiff peaks, then gently fold into batter.
Bake: Divide batter into pans. Bake for 20–24 minutes. Cool completely.
Make the frosting: Beat cream cheese and butter until smooth. Gradually add sugar, vanilla, and salt. Whip until fluffy.
Assemble: Stack layers with frosting. Crumb coat, chill for 20 minutes, then frost fully. Chill 1 hour before slicing.
Tips:
Use gel food coloring for vibrant red without thinning the batter.
For clean slices, chill the frosted cake before cutting.
Enjoy your moist, velvety masterpiece! 🍰
Nutrition Facts
Servings 12
Serving Size per slice
Amount Per Serving
Calories650kcal
% Daily Value *
Total Fat35g54%
Saturated Fat15g75%
Total Carbohydrate80g27%
Protein6g12%
* Percent Daily Values are based on a 2,000 calorie diet. Your daily value may be higher or lower depending on your calorie needs.
Keywords:
Red Velvet Pound Cake, Cream cheese Frosting for Red Velvet Cake, Red Velvet Slice Cake, Red Velvet cake, Red Velvet Cake With Cream Cheese Frosting Recipe
Did you make this recipe?
Tag @emadams092 on Instagram and use the hashtag #TastyByYummy so we can see and share your delicious creations!